ExternalHardDrive
Back to the Main Hard Drive PagePage 1 | Page 2
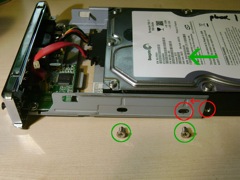 Prepare to Secure the Drive The drive will be secured into the tray using two screws on each side. You will need to slide the drive into the tray so that the screw holes on the side of the drive line up with the holes in the side of the tray. The red circles show the holes when they are not lined up. |
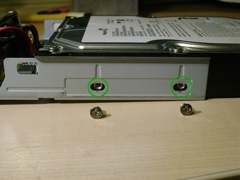 Proper Alignment of the Hard Drive in the Tray Here you can see that the screw holes in the side of the hard drive line up with the holes in the side of the tray. |
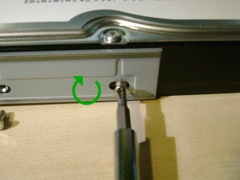 Secure the Hard Drive with Screws Secure the hard drive using two screws on each side of the tray. Use your #1 philips head screwdriver and rotate the screws clockwise to tighen them. You do not need to tighten them more than just being snug. Their purpose is to keep the drive from sliding around and becoming unplugged. |
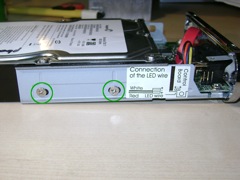 Screw in All Four Side Screws There are two screws on each side of the tray, for a total of four screws that secure the hard drive to the tray. |
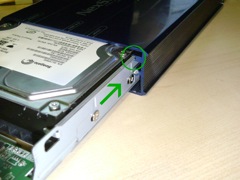 Slide Tray into External Housing Carefully align the tiny lip of the metal tray with the mating slot on the inside edge of the external housing. You must also align the tray on the other side with its corresponding slot. It slides easily once aligned. Push it most, but not all of the way in. Leave about 1 inch of the tray outside the external housing, because you will need to connect the LED connector. |
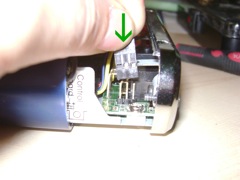 Connect the LED Connector Carefully align the LED connector. It doesn't actually matter whether it is left or right -- the enclosure is designe to work either way you plug it in. You don't need to push hard to get it to engage. Just make sure the three holes in the plug go onto the three pins sticking up. Press it all the way down until you can't see the pins anymore. |
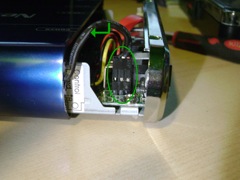 Slide the Tray All the Way In Once the LED connector is all the way down on its three pins, press down on the wire connected to it so it doesn't interfere with the tray as it slides in. Slide the tray all the way in until it mates with the external houseing to leave no gap between the two. |
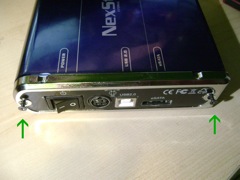 Replace the External Screws Insert the two screws you saved when you first opened up the enclosure. |
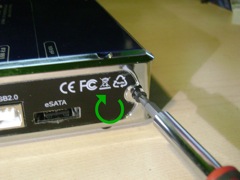 Final Assembly Screw in the two screws that secure the tray to the external housing using your #1 phillips head screwdriver by turning the screws clockwise. Don't overtighten them. Just get them gently snug. |
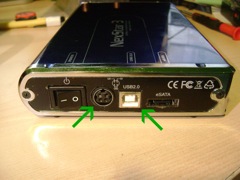 Connect the Drive to Its Power and Your Computer First make sure the power switch on the exterenal enclosure is switched off. Then connect the external power supply to the enclosure and then connect a USB 2.0 cable to the external enclosure. Finally, connect the other end of the USB 2.0 cable either to an unused USB port on your computer or to a USB hub. However, do not connect it to a hub with any other USB 1.0 devices and do not connect it to your keyboard. Connecting a drive to a keyboard or a hub with other 1.0 devices will cause your drive to operate 50 times slower than USB 2.0 speeds! |