ExternalHardDrive
Back to the Main Hard Drive PagePage 1 | Page 2
First, before you open up the plastic bag containing the hard drive, touch an electrical ground such as a metal part on your mac. Now open up the plastic bag containing your hard drive and touch the metal part of your mac and then, while still touching your Mac, also touch the side of drive inside. Then, while still touching your Mac, also touch a metal part of the external enclosure (not a chrome plastic part!)
 New Enclosure The new enclosure will be empty. You will have to open it up to install the hard drive. |
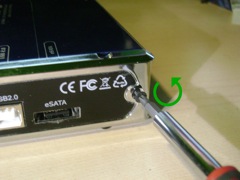 Remove Two Small Screws Remove two screws by turning the #1 philips head screwdriver counter-clockwise. |
 Remove and Save Screws Carefully remove the screws and save them, for example, in a shallow bowl so they don't fall on the floor. |
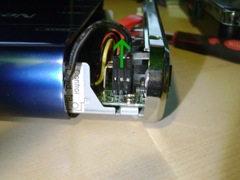 Unplug the LED Connector The drive may or may not come with the LED connector already connected. If it is connected simply pull it up to disconnect it. You cannot open the case more than about one inch until this has been disconnnected without damaging the unit. |
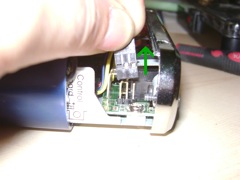 Pull the LED Connector Free It doesn't take a lot of force to pull it upward. Don't yank it -- there isn't a lot of spare wire. |
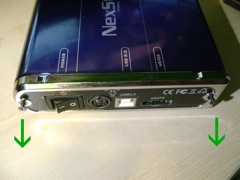
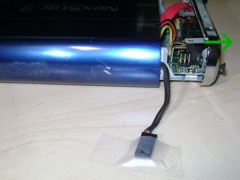 Pull the Tray Out After the LED connector has been disconnected you can pull the tray out slowly. I taped the LED connector wire to the table only so it would not confuse the picture. You do not need to tape it down. |
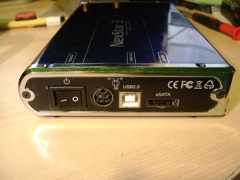
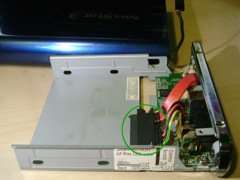 The SATA Connector This is the SATA connector. It will ultimately plug into the mating sockets on the hard drive. It may be on the end of cables or it may actually be firmly attached to the circuit board. You do not have to move or adjust the connector. |
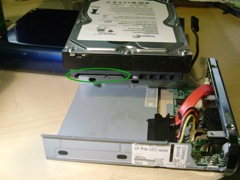 The SATA Connection on the Hard Drive I've set the hard drive on top of the enclosure exposing the end that has the SATA connectors. |
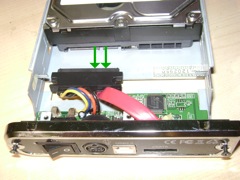 Connect Drive to Enclosure SATA Connector Slide the drive carefully toward the circuit board so that the SATA connector from the enclosure exactly mates with the SATA connector on the hard drive. Do not force this -- it should fit with only gentle pressure. Push it all the way in. |
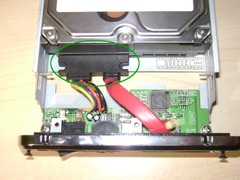 Properly Mated SATA Connectors This is what the SATA connectors look like when they are properly connected. They really only fit one way. This isn't complicated. |