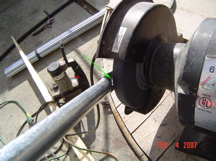
Grinding Flash Here you can see the flash being ground off by the grinding wheel. Click the picture for a better view. You need to grind both sides of each end. |

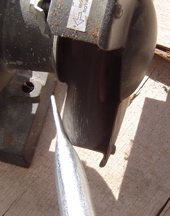
Grinding the End In addition to the flat sides, grind the very end of the strut. |
Grinding the Corners In addition to the rest, grind the corners of the flat end of the strut. By the time you've ground all these parts, it will be rough, but most of the shards will be ground off. |
Wire Wheel to Finish the Strut The final step is to use the wirebrush on the flats, the end and the corners (the same places you just ground), as this and the next photos show. When you're all done, the end of the strut and the hole will all be smooth and have no real chance of hurting anyone. Remember: the injury you save will most likely be your own. |

Wire Wheel the Corners The arrow points out a sharp edge left behind by the grinder. |
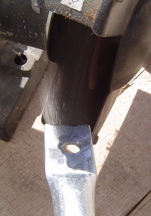
Wire Wheel the strut end Hey, that's the last step! This end of the strut is done. :-) |
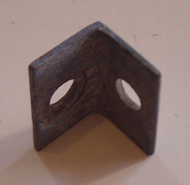
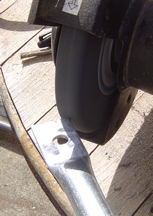
An Angle Bracket You're going to need 15 angle brackets for the entire dome deck project. You might as well make a few extra -- they are pretty useful for attaching things to your dome. The angle brackets are fairly easy to make. Start with angle iron. I used stock that was 1/8" thick and 1.25" wide (e.g. the flat portion is 1.25"). Then I cut 2" sections of it using the abrasive disk. Careful, the steel will get really hot when you cut it. Use gloves to protect your hands. I recommend clamping the angle iron in a vise to hold it solidly when you are cutting it. I used the grinding wheel to clean up the edges of each bracket (just like I did for the struts) so that there were no sharp edges. Then you need to drill them. I drilled mine with a 1/2" cobalt steel bit. Since I use carriage bolts, and because carriage bolts have a square section right under the round head, I use the 1/2" bit so that the square portion fits inside the hole in the bracket. I put the angle brackets into a vise on my drill press. If you drill them by hand, you should still use a vise to hold them while you drill. You'll probably have the best luck by first drilling a 1/4" hole, and then following it up with a 1/2" drill bit. It is difficult to start with a 1/2" drill bit. Remember to use a slower speed when drilling steel (e.g. ~800 RPM or so).
|
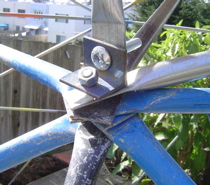
Angle Bracket in place Here you can see the angle bracket in place. Notice that the bolt that secures the bracket to the dome faces "out" from the dome. You could put the angle brackets on when you build your dome if you want the bolt to face "in." |