<--Previous  Up  Next-->

assembly

Dome Deck Assembly
Above you can see the completed deck structure. Here are instructions for its assembly.
  1. Assemble the 2v dome on which the deck will be mounted.
  2. Attach one angle bracket at each of the five verticies on the top pentagon of the dome.
  3. Attach one vertical riser to each of the angle brackets. The angle bracket should be aligned so that the riser can rotate up and down (e.g. so that it could lay right on top of the radial strut that attaches to the same vertex that the angle bracket is attached to). In this image, the riser in the foreground is not correctly aligned.
  4. Add an angle bracket at the top of each riser.
  5. Connect the tops of adjacent risers with a dome deck strut. These should have unbent ends -- unlike the rest of the struts in the dome. These struts are the same length as the long struts in your dome. The structure will be wobbly, so you may need some help to move other risers around so that you can make the connection.
  6. Now add the deck diagonals. You'll have to partially disassemble a bottom and a top riser to add the diagonal, but there isn't a lot of force on these yet, so it shouldn't be a problem. You need to be sure that all the diagonals go from the bottom of a riser to the top of the next one. No two diagonals should meet at a top or bottom. This is critical.
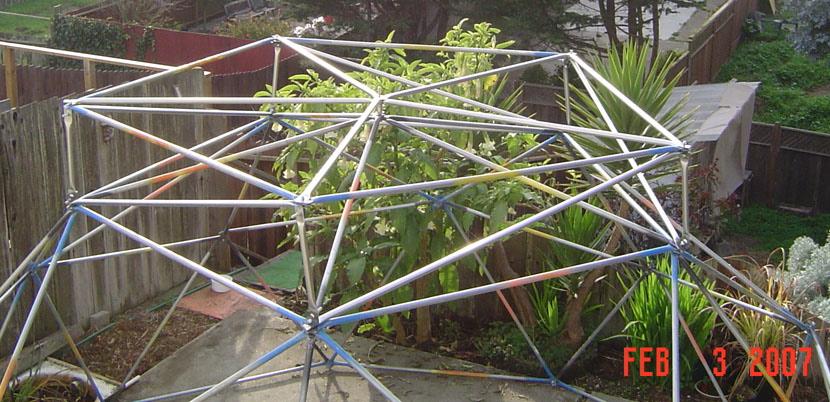
    When I first tried to assembly the deck, I found I could not accomplish it. I could not make the final connections without bending struts! I made the mistake of having the diagonals go:
    top--to-bottom, bottom-to-top, top--to-bottom, bottom-to-top, top--to-bottom,
    Then I realized that if they all go top-to-bottom, it creates a degree of freedom that wouldn't otherwise exist. If the diagonals are too long or too short, the deck pentagon can rotate to accommodate the error. It means that the rectangle formed by two adjacent risers plus a dome top pentagon strut and a deck pentagon strut will become a parallogram. But, even if it does, it will still be rigid once the whole structure is assembled.
  7. Finally, add the deck radial struts. These go from the center to each of the riser tops. You may need a spacer on the center bolt to raise the radial struts up high enough so that they are exactly horizontal. You can see the riser I made on the previous page from a section of scrap 3/4" conduit and a few washers.

All information herein copyright 2007 by Howard Cohen
hoco@timefold.com